

How to make a Unity3D Ball Roller game
I followed http://unity3d.com/learn/tutorials/projects/roll-a-ball, and updated the steps for the newest Unity3D currently available (4.5). You can try the game and download the project on GitHub.
- Create a new 3D project and save a scene in a Assets/Scenes folder
- Game object – 3d object – Plane, and rename to Ground
- Transform – Reset -> sets to 0,0,0 origin point of the world
- Edit – Frame selected or character F
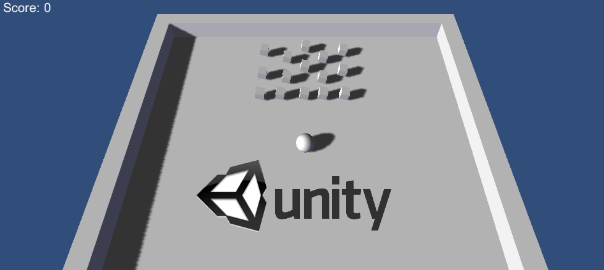
- Hierarchy -> Create -> 3D object -> Sphere, and again Transform – Reset and again Edit – Frame selected, rename it to Player
- Hierarchy -> Create -> Light -> Directional light (name it Main Light)
- Rotation x 30, y 60
- Shadow – Soft
- Very high resolution
- Duplicate Main Light and reverse the Rotation x -30, y -60
- Color – some blue, intensity 0.1, no shadows
- We use Folders in Project tab to organize stuff and Empty game objects in Hierarchy tab
- Create empty object and rename to Lighting
- reset transform origin, drag other lighting related object in here
- set the y position to 100 so that you move the lighting up (they are based on rotation and not position so that if you place it high up it’s just a matter of “not getting in the way” and they will still work as expected)
- Player object -> add Component -> Physics -> Rigidbody
- [Moving the player] Create a Scripts folder. Create a script (on the Player object add Component -> New Script) and place it in this folder
- Update() – here goes the game code (before rendering the frame)
- FixedUpdate() – here goes the physics code (before performing any physics calculation)
- To read an axis use Input.GetAxis with one of the following default axes: “Horizontal” and “Vertical” are mapped to joystick, A, W, S, D and the arrow keys. “Mouse X” and “Mouse Y” are mapped to the mouse delta. “Fire1”, “Fire2” “Fire3” are mapped to Ctrl, Alt, Cmd keys and three mouse or joystick buttons.
- Add this script:
var speed : float;
function FixedUpdate () {
	var moveHorizontal = Input.GetAxis("Horizontal");
	var moveVertical = Input.GetAxis("Vertical");

	var movement = Vector3(moveHorizontal, 0.0f, moveVertical);

	rigidbody.AddForce(movement * speed * Time.deltaTime);
}
- [Moving the camera] Raise the camera a little and tilt it by setting the rotation. Make it the child of the player (drag the Main Camera to Player object). If you run the game at this point you will see all went bazinga. So, we can’t have it as a child – detach it. What we can do however is attach a script to the camera and offset it based on the position of the player object:
- Add script to Main Camera:
var player : GameObject;
private var offset : Vector3;
function Start () {
    offset = transform.position;
}

function LateUpdate () {
    transform.position = player.transform.position + offset;
}
- Add script to Main Camera:
- [Adding the walls] – Add new empty object Walls
- Create -> 3D object -> Cube (rename to West Wall) and add it as a child to Walls
- repeat for other 3 walls
- [Adding collectible objects]
- Create -> 3D object -> Cube (rename to Pickup)
- Reset transform origin
- Scale to 0.5 on all axes
- Rotate 45° on all axes
- Add a script (Rotator):
function Update () { transform.Rotate(Vector3(15,30,45) * Time.deltaTime); } - Create a new folder called Prefabs in the root directory and drag the Pickup object inside it in order to, well, create a Prefab which you can think of as a variable which you can then access with all its parameters. So, when you clone the prefab object, it will have all the behavior that the cloned prefab has.
- Create an empty object and drag the prefab inside it
- Set orientation to global mode and duplicate a few of the collectibles
- [Collision detection]
- Add the tag ‘PickUp’ to the Pickup prefab
- Add the following function to the Player object script:
function OnTriggerEnter(other : Collider){ if(other.gameObject.tag == 'PickUp') other.gameObject.setActive(false); } - Set Box collider Is Trigger to true in the Pickup prefab and this gives you OnTrigger function
- Unity caches all the static colliders – everytime we move, rotate or scale the static colliders, the Unity will recalculate the cache – takes resources! We can move, rotate or scale dynamic colliders and Unity will not cache them. Any game object with a collider and a rigid body is considered a dynamic object. Any game object with a collider and no rigid body is considered a static object
- Add a rigidbody to the Pickup prefab. If you start the game now, the Pickup object will fall to the ground because of the Gravity. You can uncheck the Gravity option, but a better solution is to keep it and check the Is Kinematic option.
- Static colliders shouldn’t move – walls and floors
- Dynamic colliders can move and have a rigidbody attached
- Standard rigid bodies are moved using physics forces and Kinematic rigid bodies are moved using transform object
- [Counting picked up object]
- Add a new variable to the PlayerController script and increment it in the OnTriggerEnter function
- Add a new empty game object
- Choose “Add Component” -> “Rendering” -> “GUIText”
- Transform position (x,y,z) = (0,1,0)
- Anchor – upper left
- Alignment – center
- Pixel offset – 5,5
- Font size – 20
- Add the GUIText variable to the PlayerController script:
public var scoreText : GUIText; function SetCountText(){ scoreText.text = 'Score: ' + score.ToString(); } - Do the same with the winText (create object, add the public variable in PlayerController script) and drag it to the Player object
- [Publishing the game]
- File -> Build Settings
- Select the target platform
- Click on the Switch platform button
- Click on the Buildbutton
- [Added bonus]
- To create a Physics Material select Assets->Create->Physics Material from the menu bar. Then drag the Physics Material from the Project View onto a Collider in the scene.
- This way you can make the walls bounce the ball


Leave a Comment